Integrating booking portal on your website
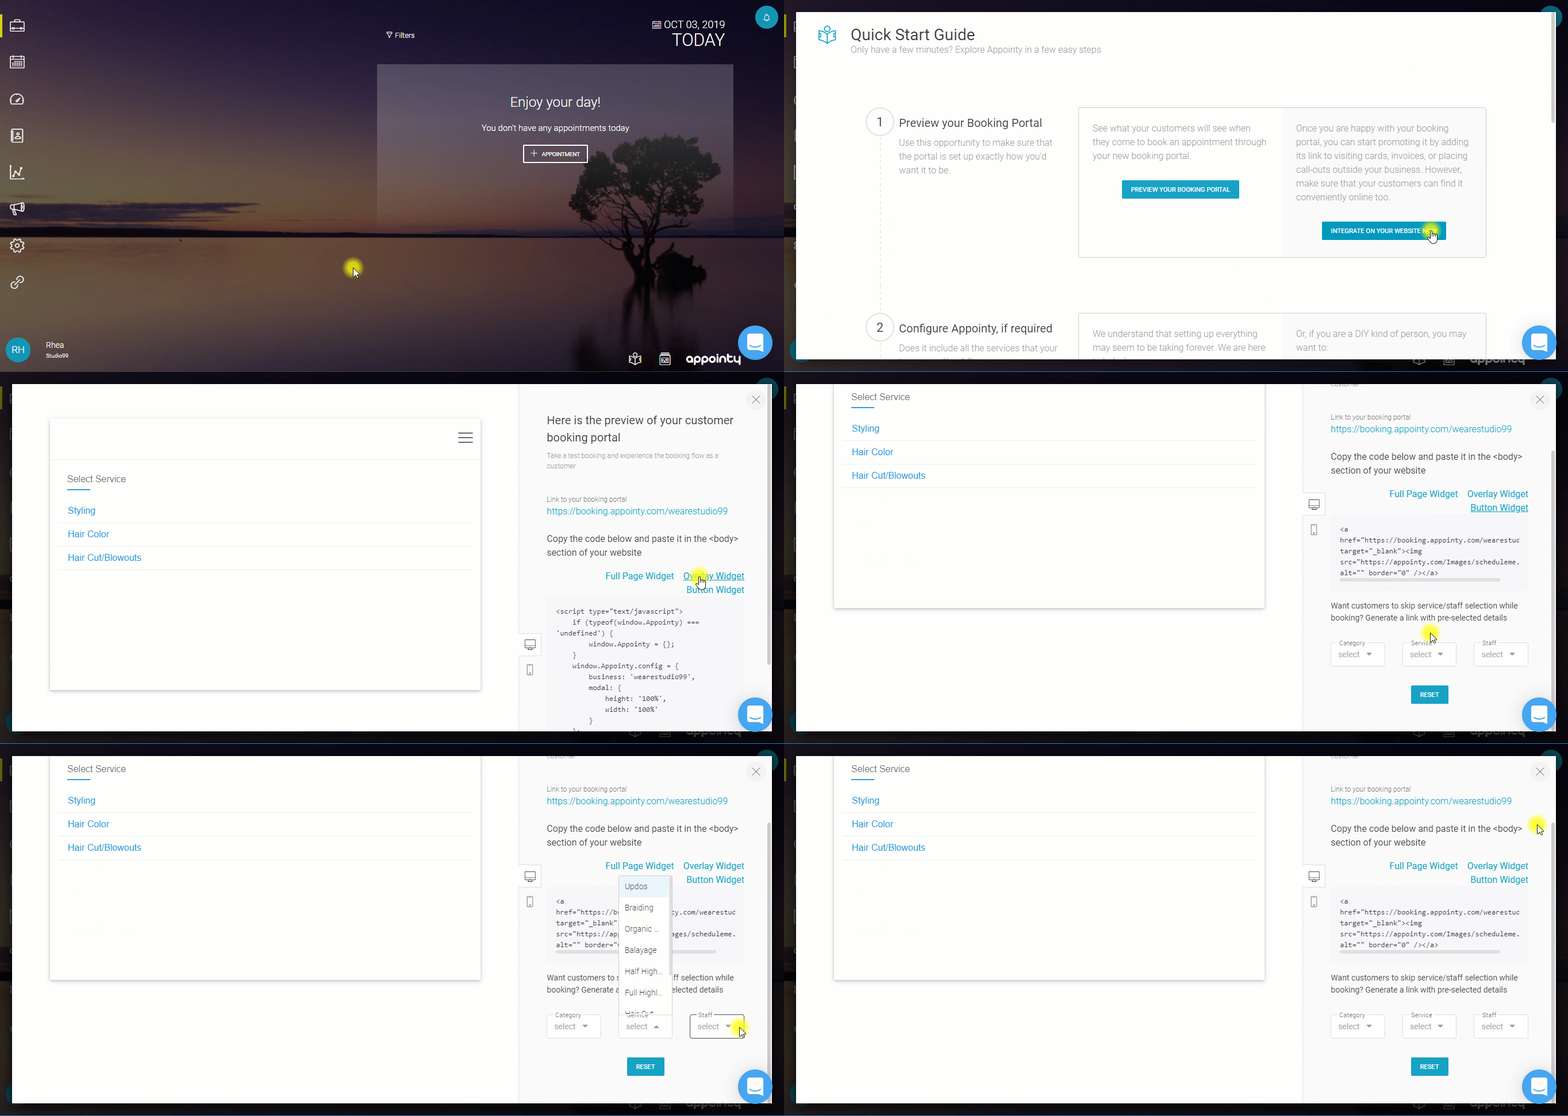
There are three formats in which you can integrate the booking portal on your website:
- Full Page Widget
- Overlay Widget
- Button Widget
To integrate the booking portal on your website:
- Go to the 'My Space' area.
- Click on the ‘Quick Start Guide’ icon on the bottom-right of the window.
- The ‘Quick Start Guide’ window appears.
- Click on the ‘Integrate on your website now’ button to integrate the booking portal/ client-side on your website.

You can also generate a category-service-staff parametric booking URL if you do not want the clients to select the service category, service and staff member while booking with you.
Integrating Appointy with your Facebook page
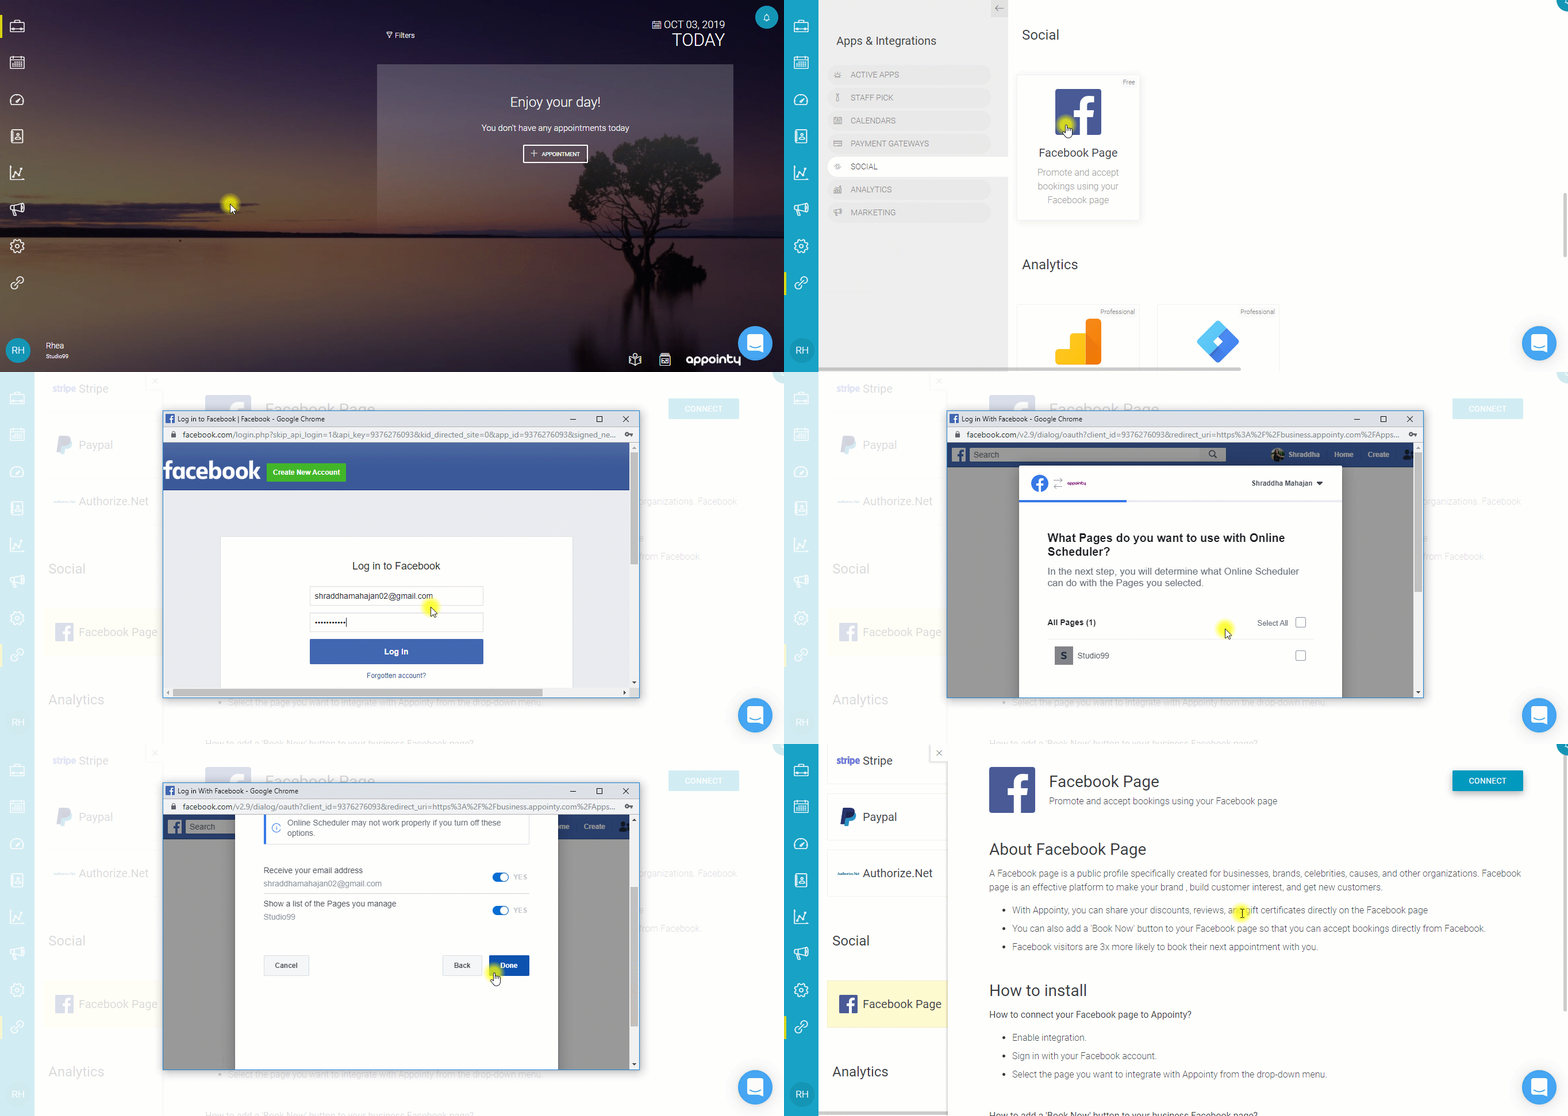
- Click on the ‘Marketplace’ icon on the toolbar. The ‘Apps & Integration’ window appears.
- Click on the ‘Social’ option under Apps & Integrations.
- Select the ‘Facebook’ icon to enable it. A new window will be displayed.
- Click on the ‘Connect’ button at the top-right corner of the window.
- You’ll be redirected to a new window. Sign into your Facebook account and select the page you want to integrate.

You can also add a 'Book Now' button to your Facebook business page which will allow your clients to instantly schedule a booking with you.
Similarly, you can also integrate your booking portal with your Instagram business page and add a 'Book Now' button on your Instagram booking page.
Click here to integrate your booking URL with your Instagram booking page.