There are two ways you can remove an add-on from a service.
Option 1
Quick Nav — (Settings → Add-on → Mouseover on the add-on that you want to remove from the service → Click on the pencil-like edit icon that appears on the right against the add-on → Deselect the service from the ‘Update Add-on’ side panel → Click on ‘Update’ → Click on ‘Save Changes)
- Log into the Appointy admin panel.
. - Click on the ‘Settings’ icon in the toolbar appearing on the left.
. - Go to the ‘Add-on’ tab under the ‘Customization’ section.
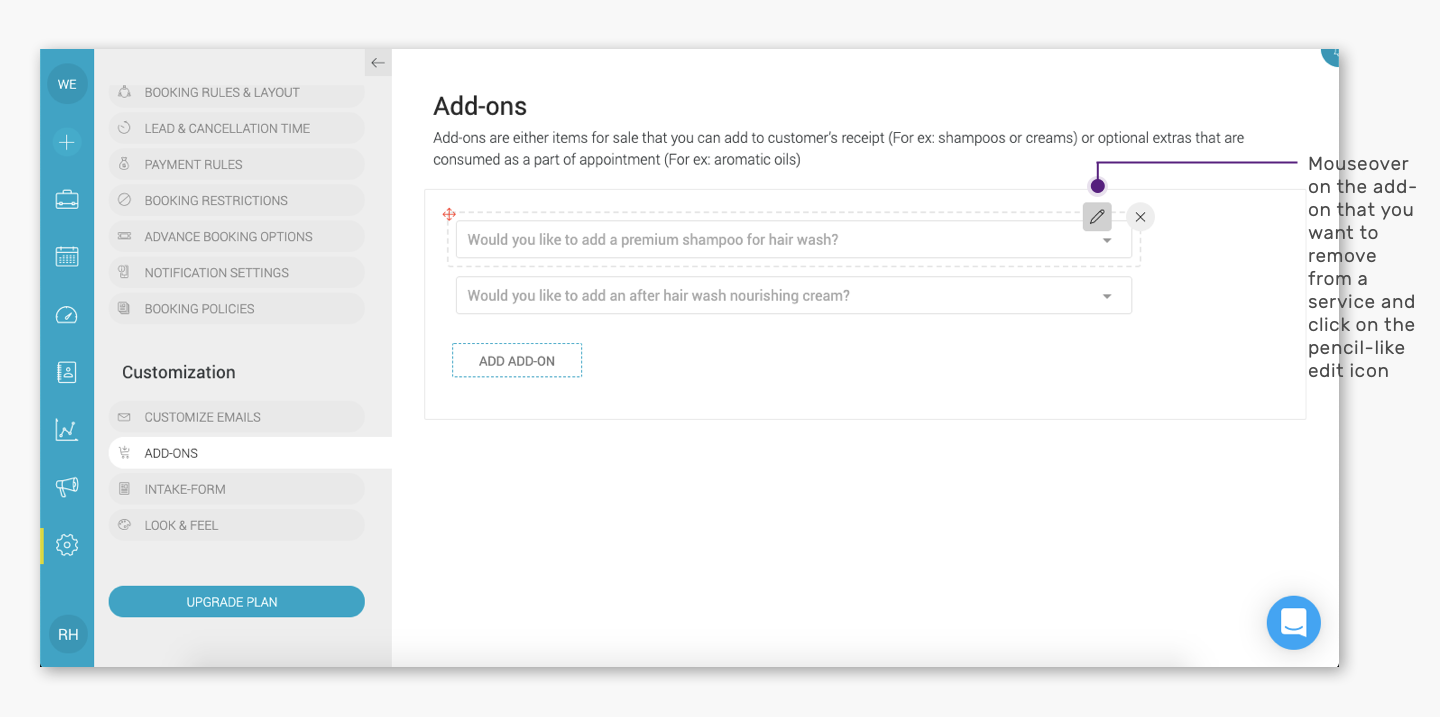
. - Mouseover on the add-on that you want to remove for the service and click on the pencil-like edit icon that appears against the add-on.
.
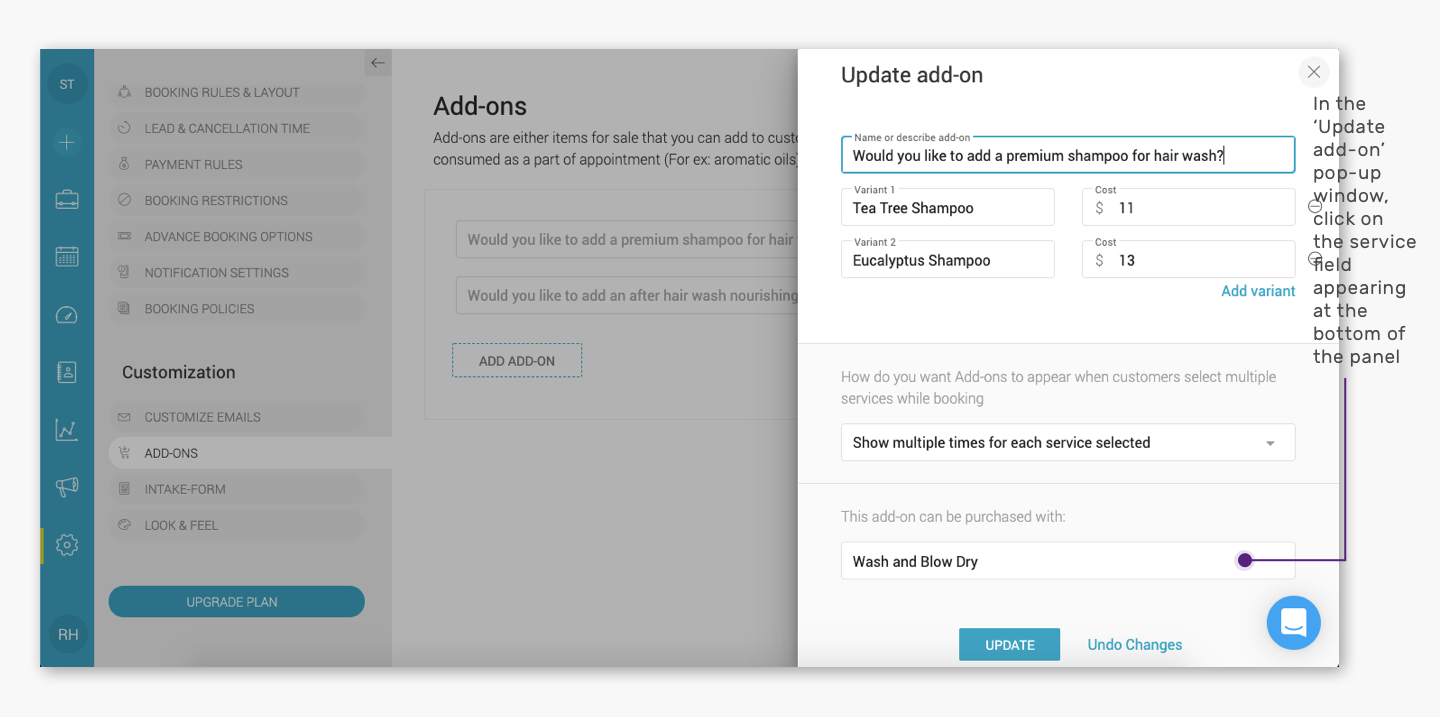
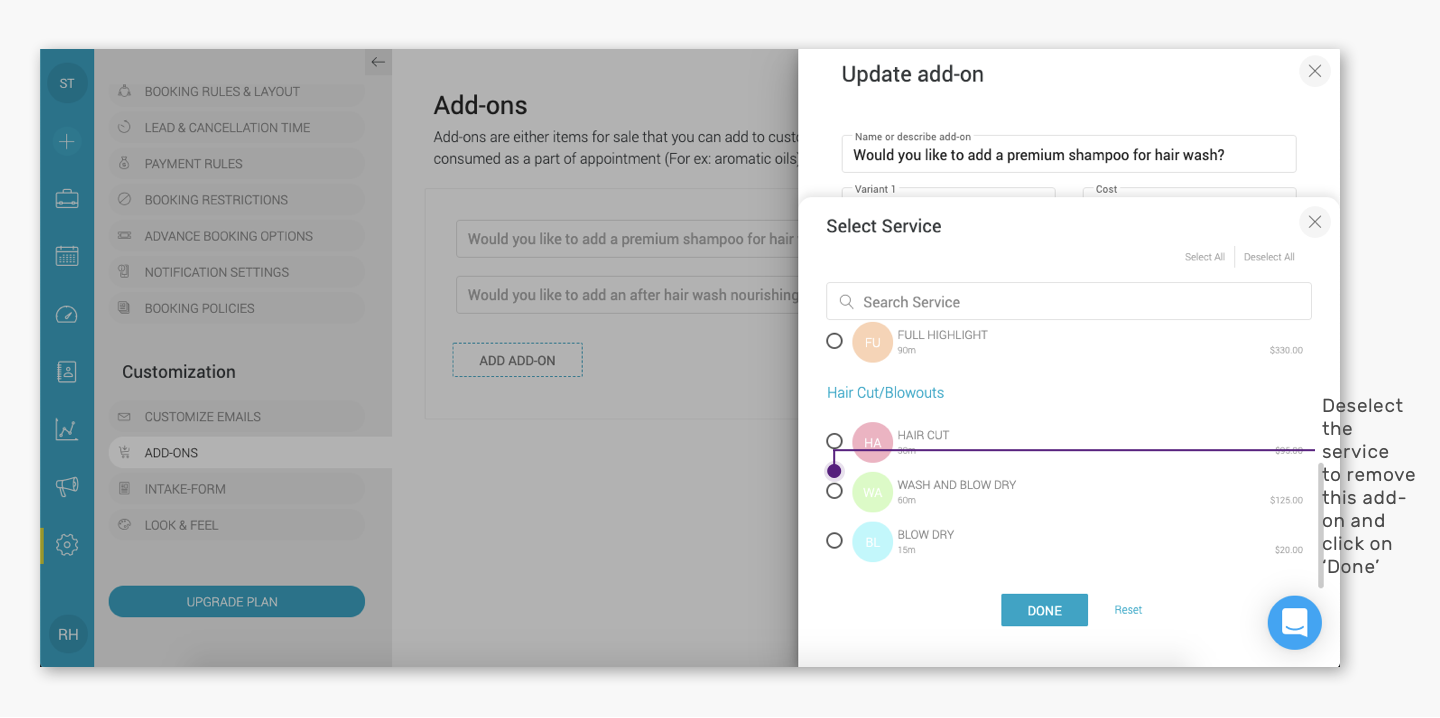
. - In the ‘Update Add-on’ side panel, deselect the service(s) from which the add-on needs to be removed.
.
.
. - Click on the ‘Update’ button in the ‘Update Add-on’ side panel and then click on ‘Save Changes’.
Option 2
Quick Nav — (Settings → Service → Click on the service name → Go to the ‘Add-on’ tab → Mouseover on the add-on that you want to remove from the service → Click on the pencil-like edit icon that appears on the right against the add-on → Deselect the service from the ‘Update Add-on’ side panel → Click on ‘Update’ → Click on ‘Save Changes’)
- Log into the Appointy admin panel.
- Click on the ‘Settings’ icon in the toolbar appearing on the left.
- Go to the ‘Service’ tab under the ‘Resource Management’ section.
- Select the service name and go to the ‘Add-on’ tab.
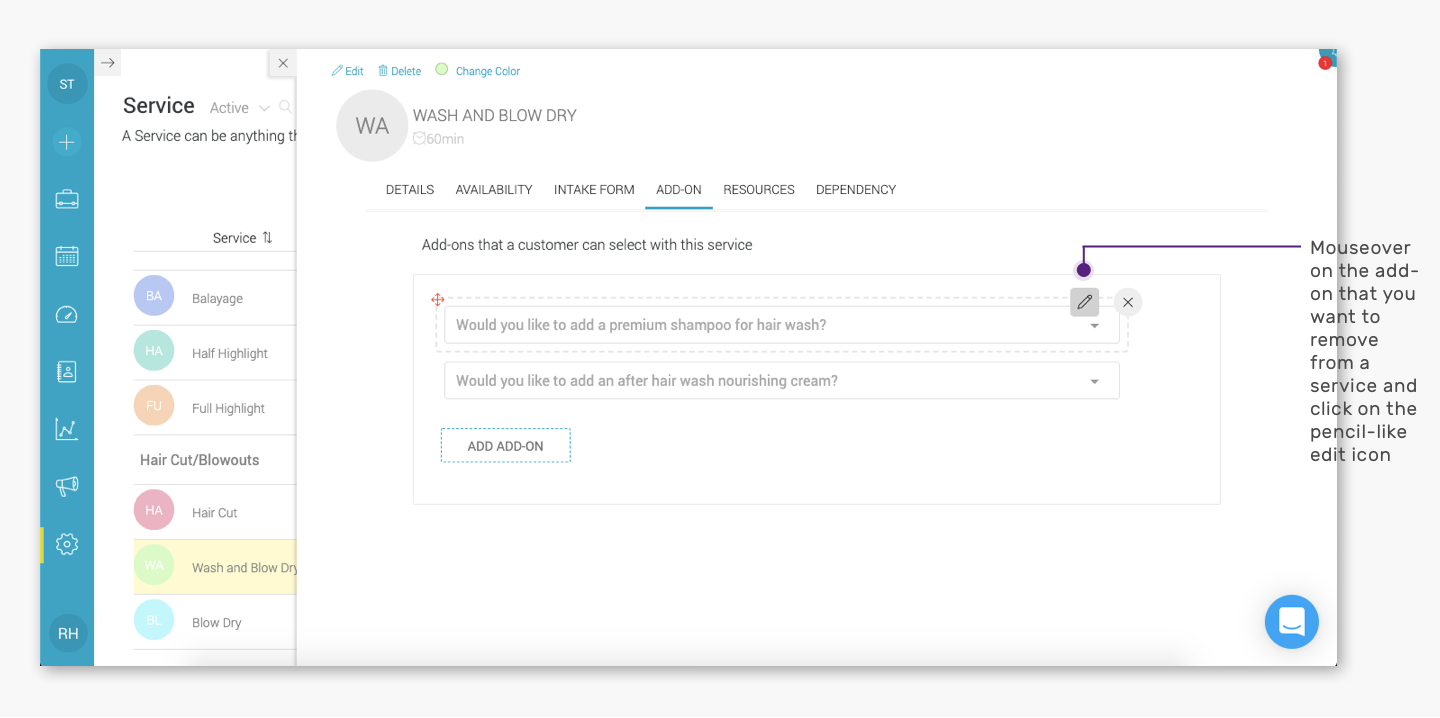
- Mouseover on the add-on that you want to remove for the service and click on the pencil-like edit icon that appears against the add-on.
.
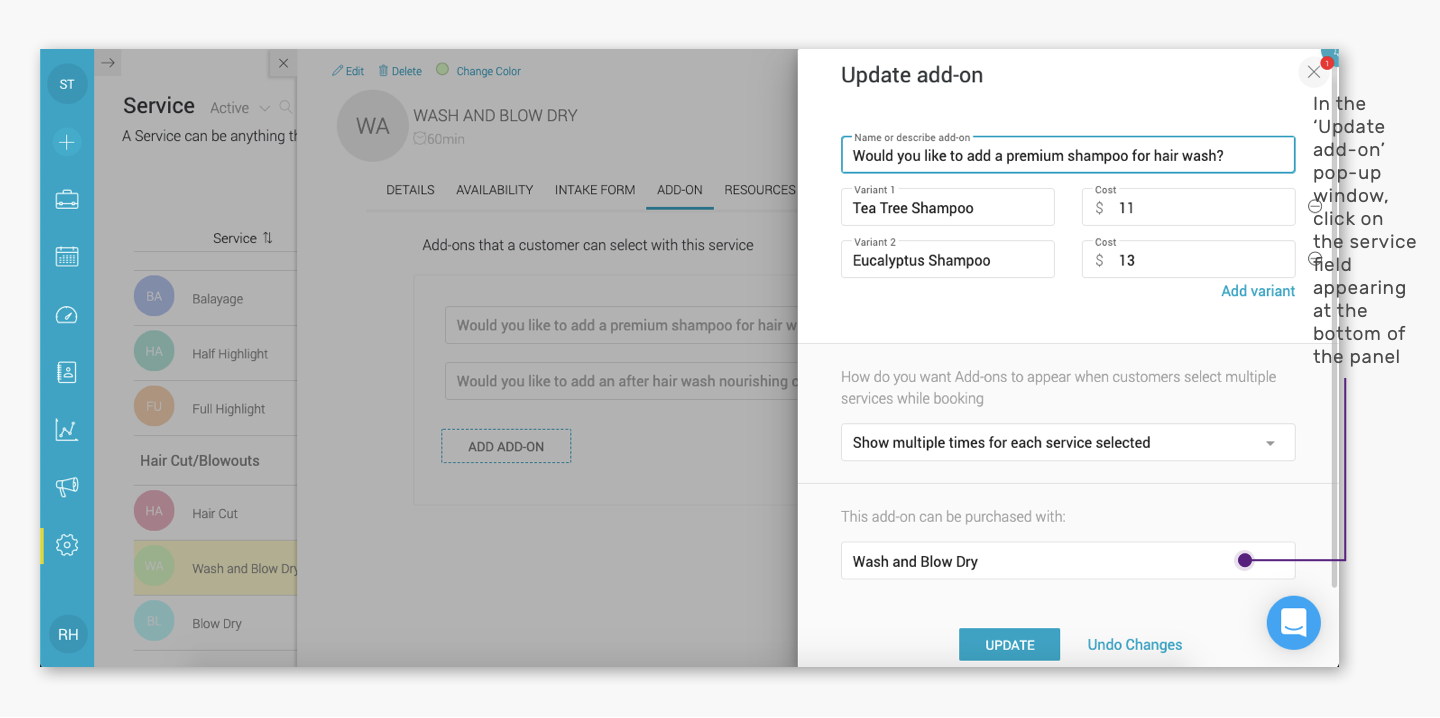
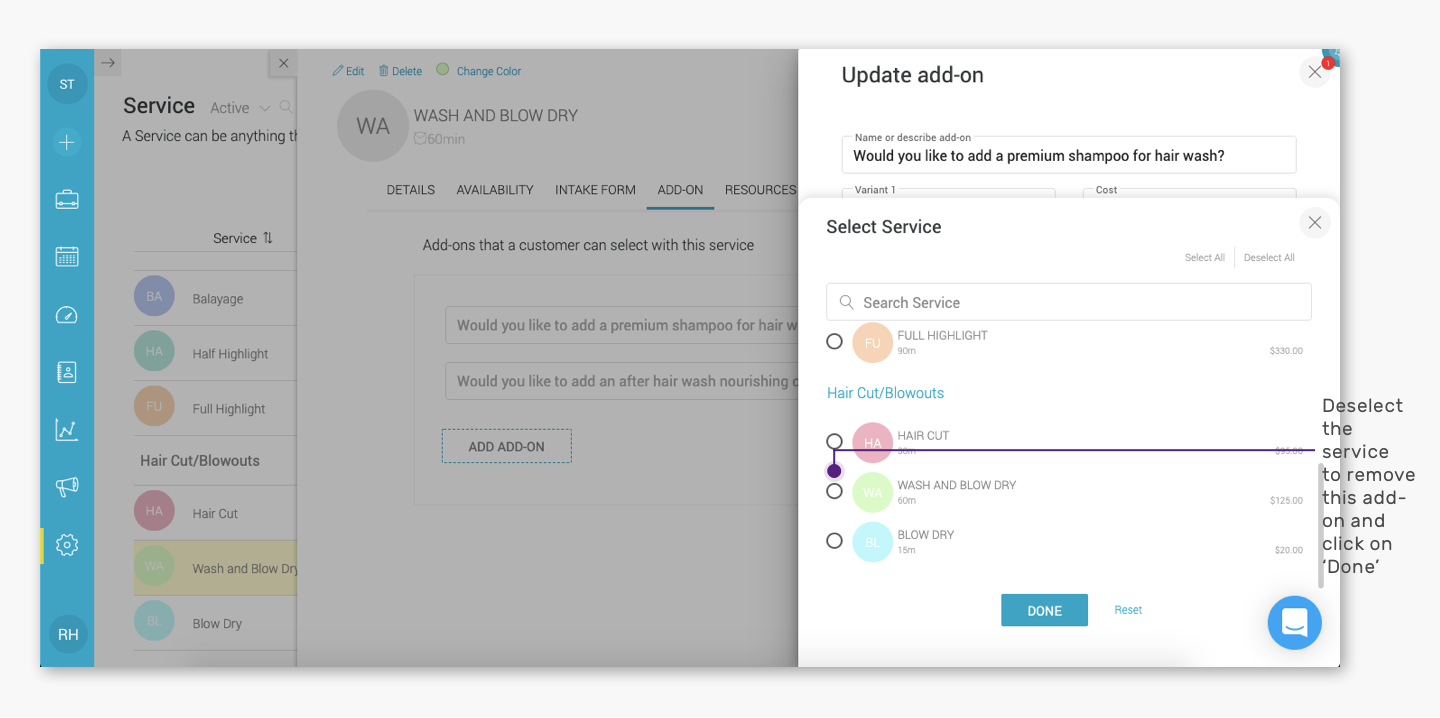
. - In the ‘Update Add-on’ side panel, deselect the service(s) from which the add-on needs to be removed.
.
.
. - Click on the ‘Update’ button in the ‘Update Add-on’ side panel and then click on ‘Save Changes’.