Here’s how you can create a custom appointment status:
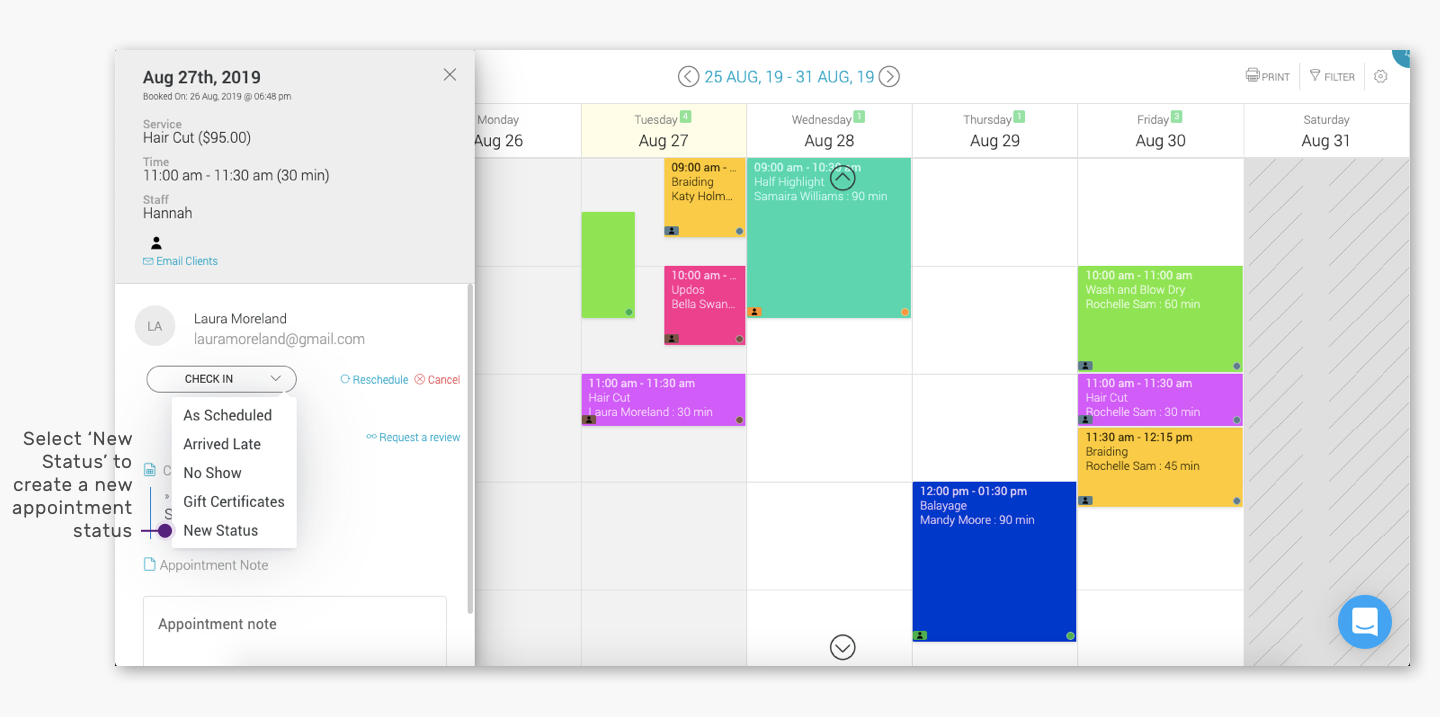
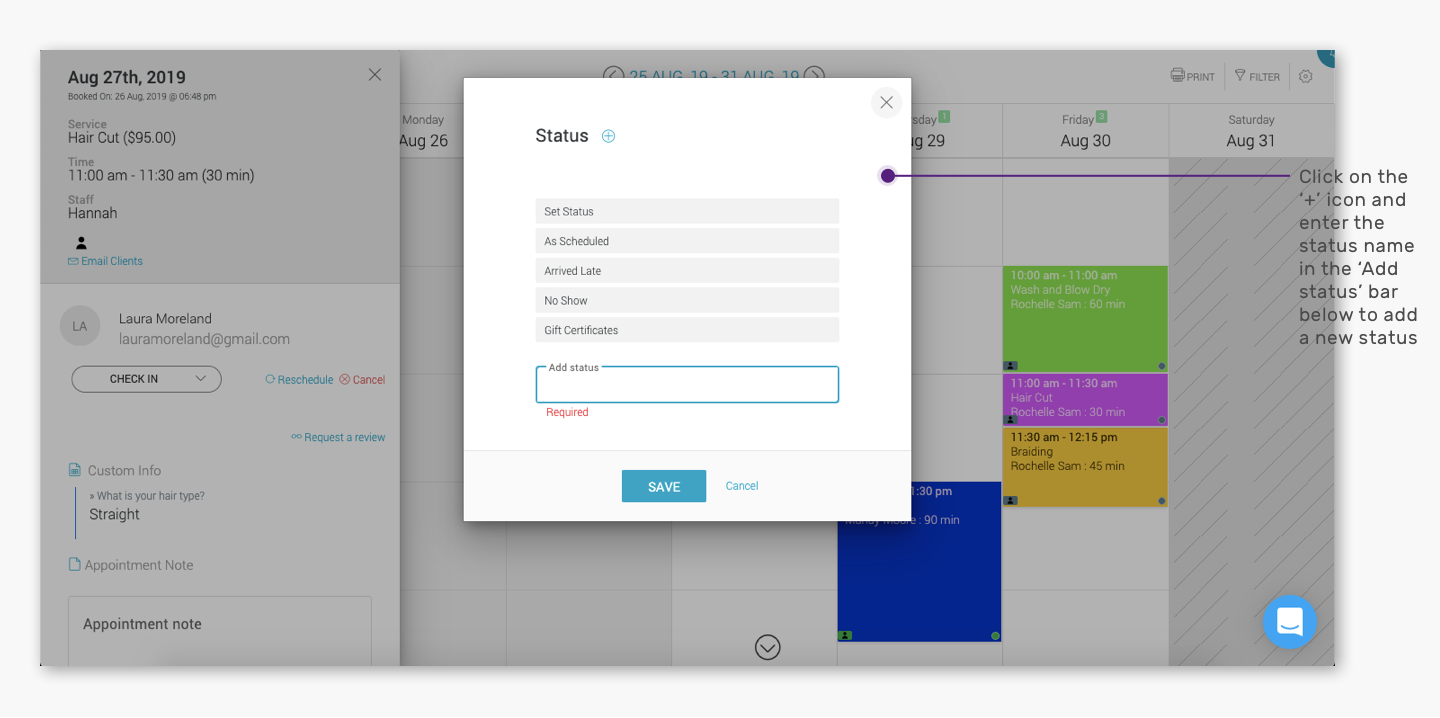
Quick Nav — (Calendar → Click on an appointment → In the appointment details side panel, click on the ‘Check-in’ tab → From the drop-down, select ‘New Status’ → Click on the ‘+’ icon in the ‘Status’ pop-up window next to the ‘Status’ title → Create a new status in the ‘Add status’ bar → Click on ‘Save’)
- Log into the Appointy admin panel.
. - Click on the ‘Calendar’ icon in the toolbar appearing on the left.
. - Click on any appointment and click on the ‘Check-in’ tab in the appointment details side panel.
. - From the drop-down menu, select ‘New Status’.
.
. - In the ‘Status’ pop-up window, click on the ‘+’ icon appearing next to the ‘Status’ title.
. - Enter a new status in the ‘Add status’ bar and click on ‘Save’.
.