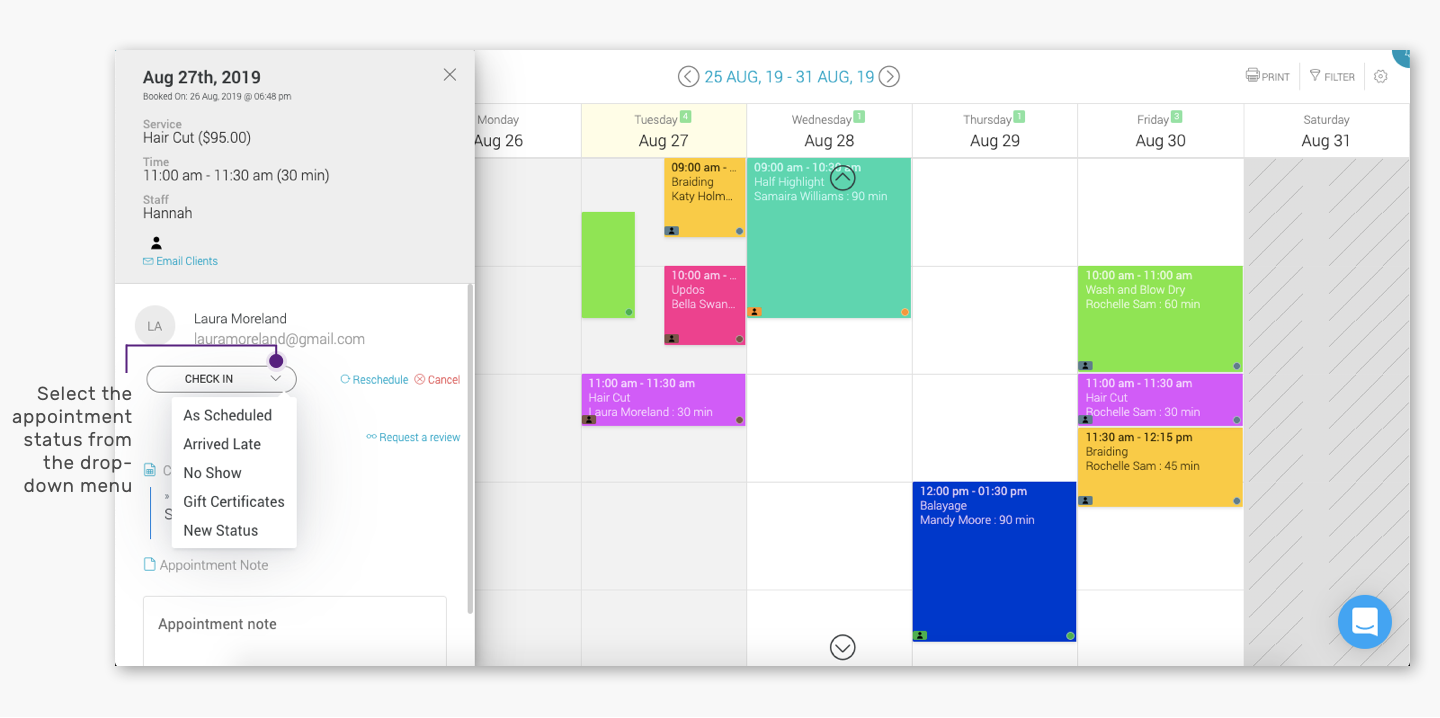
Appointy allows you to organise your appointment calendar based on the appointment status. The pre-defined status in Appointy are based on the arrival status of your clients. You can add appointment status like ‘No Show’, ‘As Scheduled’, ‘Arrived Late’ etc. or create new appointment status.
Click here to know how to create custom appointment status.
Here’s how you can add an appointment status:
Quick Nav — (Calendar → Click on the appointment for which you want to update the appointment status → In the appointment details side panel, click on the ‘Check-in’ tab and select the status from the drop-down menu)
- Log into the Appointy admin panel.
. - Click on the ‘Calendar’ icon in the toolbar appearing on the left.
. - Click on the appointment for which you want to update the check-in status.
. - In the appointment details side panel, click on the ‘Check-in’ tab and select the status from the drop down menu.
.