Appointy allows you to gather necessary client information at the time of booking an appointment through intake forms. You can assign an intake form to all or selected services as required. Each service can have a separate intake form with different form fields.
Here’s how you assign an intake form to a service:
Quick Nav — (Settings → Service → Select the service to which you want to add an intake form → Click on ‘Intake form’ tab → Click on ‘Add Fields’ to add a field to the intake form → Add details in the ‘New Field’ side panel → Click on ‘Add’)
- Log into the Appointy admin panel.
. - Click on the ‘Settings’ icon in the toolbar appearing on the left.
. - Go to the ‘Service’ tab under the ‘Resource Management’ section.
. - Click on the service name to which you want to add an intake form.
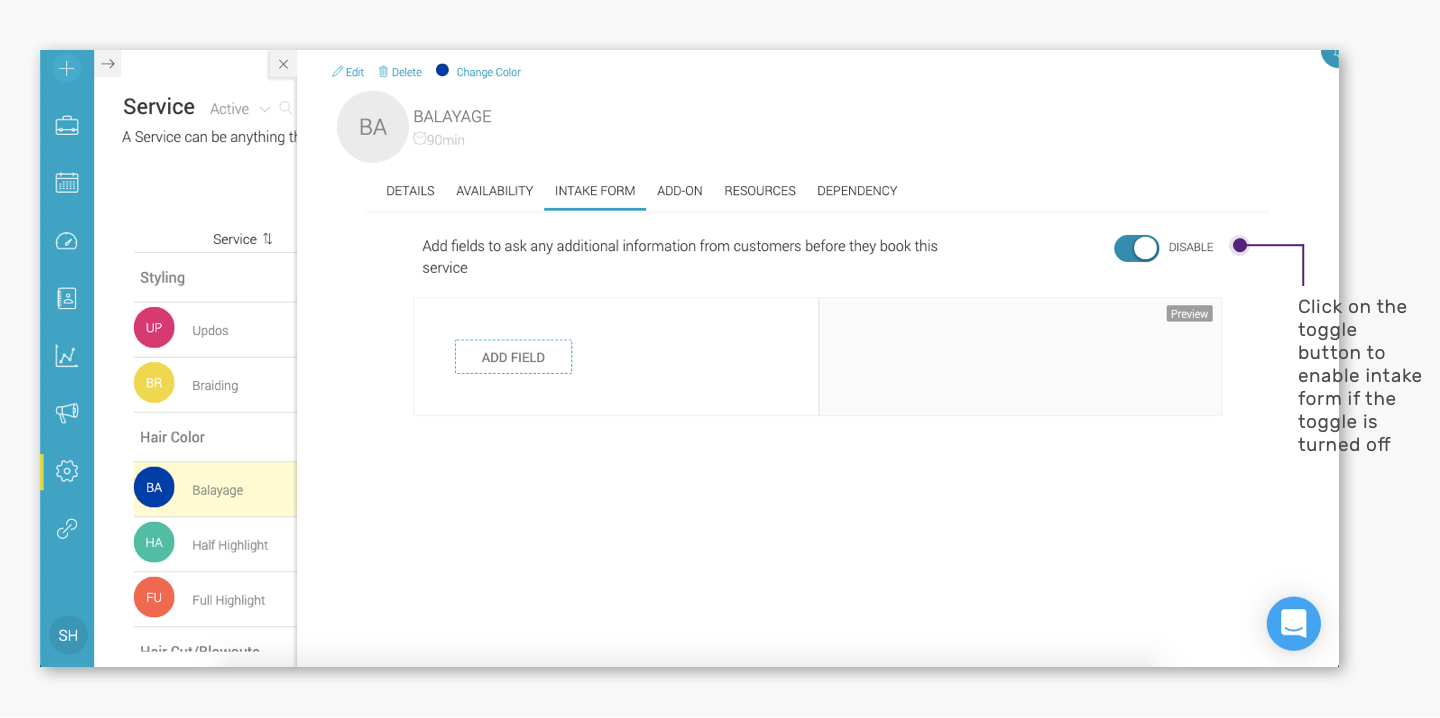
. - Click on the ‘Intake form’ tab and turn on the toggle button appearing on the right to enable intake form, if it is disabled.
.
. - Click on ‘Add Fields’ to assign a form field to the intake form.
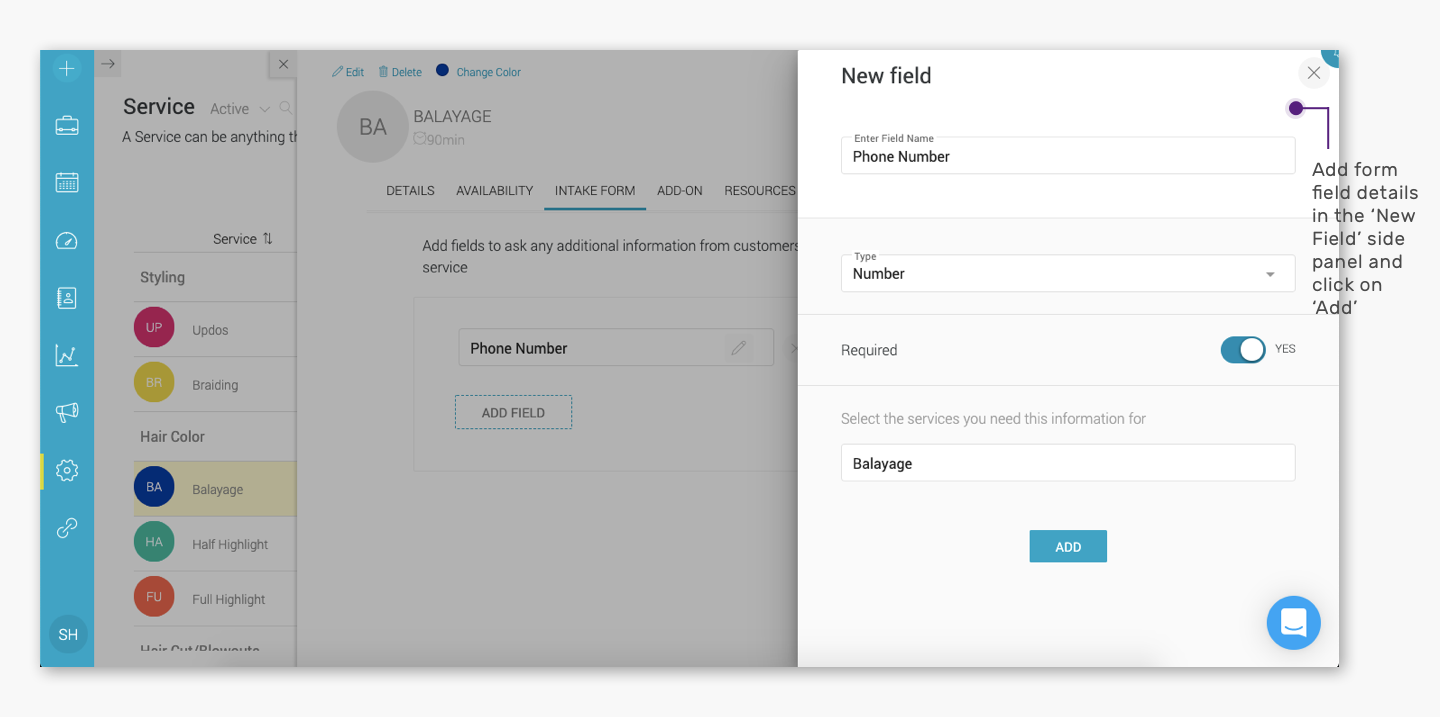
. - Add the details of the field once the ‘New Field’ side panel opens on the right and click on ‘Add’.
.
.
The form field can be anything like phone number, age, gender or anything to gather information about client’s preferences, etc. You can add this in the ‘Enter Field Name’ title head.The ‘Type’ title head defines the kind of input data that can be entered for a field. For example, if you have added the field as ‘Phone Number’ or ‘Age’, the input field type has to be ‘Number’. Similarly, if the field you have entered is ‘Address’, then you must select ‘Address’ under the ‘Type’ title head which will allow the clients to enter a mix of both text and numbers.
You can mark this field as mandatory by turning on the toggle button against ‘Required’. To assign the same intake form field to other services, click on the service name appearing at the bottom of the ‘New Field’ panel and select the services from the ‘Select Service’ pop-up.
.Input data types and what they mean.
- Text - Input data field where clients can enter general text.
- Number - Numerical input data field where the clients can only enter numbers.
- Date - Input data field for the clients to select a date in Year-Month-Date format.
- Address - Input data field for the clients to add their address which generates a mapping link for you to map the complete route from your location to the client’s location on Google Maps.
- Heading - An explanation or instruction for the clients about the intake form or a field in the intake form.
- Single Choice - Creates radio buttons as options for the client to choose any one from the multiple options.
- Multiple Choice - Creates radio buttons as options for the client to choose one or more from the multiple options.
- List - Creates a list of options in the form of a drop-down menu for the clients to choose one from the list.
- TextArea - Input data field where clients can enter general text in multiple lines.
- Click on the ‘Save Changes’ button to confirm the form field. You can add more fields to the intake form in the same manner.
You can allow the intake form to auto-populate the input fields for the upcoming bookings of a client who has already provided the information once. Enable ‘Automatically fill in the customer information from the data saved during their previous appointments’ in the ‘New Field’ side panel.