Just like staff members, you can add an image for your services as well. This gives your clients a better idea of the services that you provide. To add a service image, follow the below-given steps.
Quick Nav — (Settings → Staff → Select the service to which you want to add an image → Click on the image icon next to the service name → Choose an image from your device (image size should be less than 512 KB) → Click on ‘Upload’)
- Log into the Appointy admin panel.
. - Click on the ‘Settings’ icon in the toolbar appearing on the left.
. - Go to the ‘Service’ tab under the ‘Resource Management’ section to view your services.
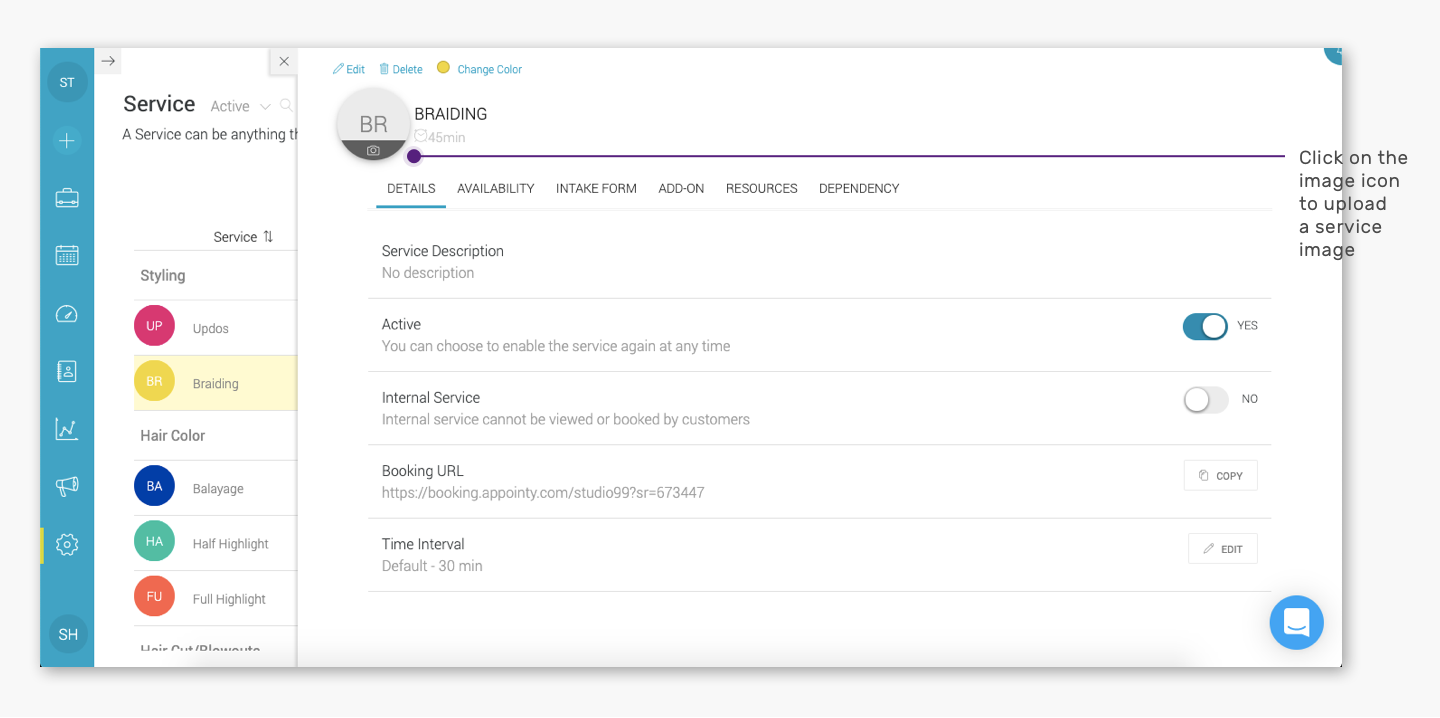
. - Click on the service name to open the service details window.
. - Click on the image icon appearing next to the service name at the top of the window.
.
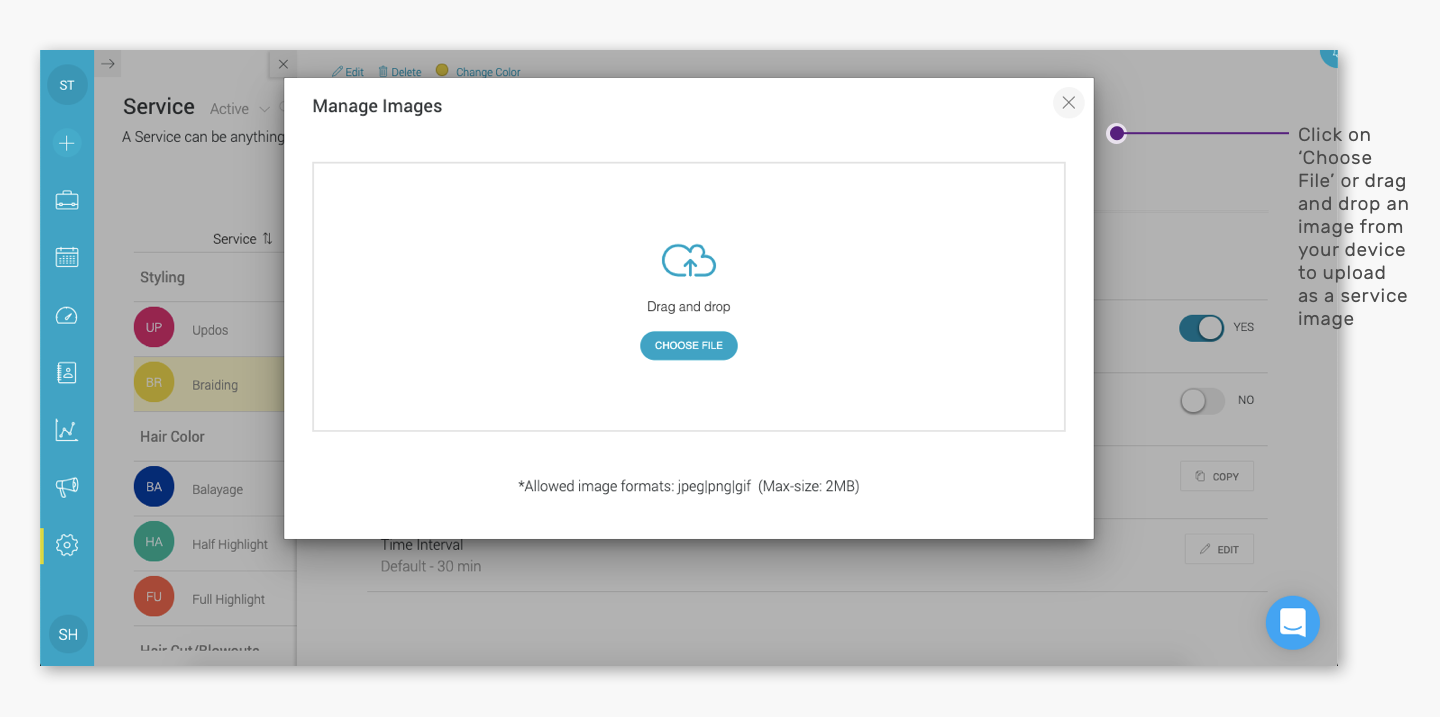
. - Click on the ‘Choose File’ button in the ‘Manage Images’ pop-up window to upload an image from your device. Or drag and drop the image (if you are using a PC) in the ‘Manage Images’ pop-up window.
.
.
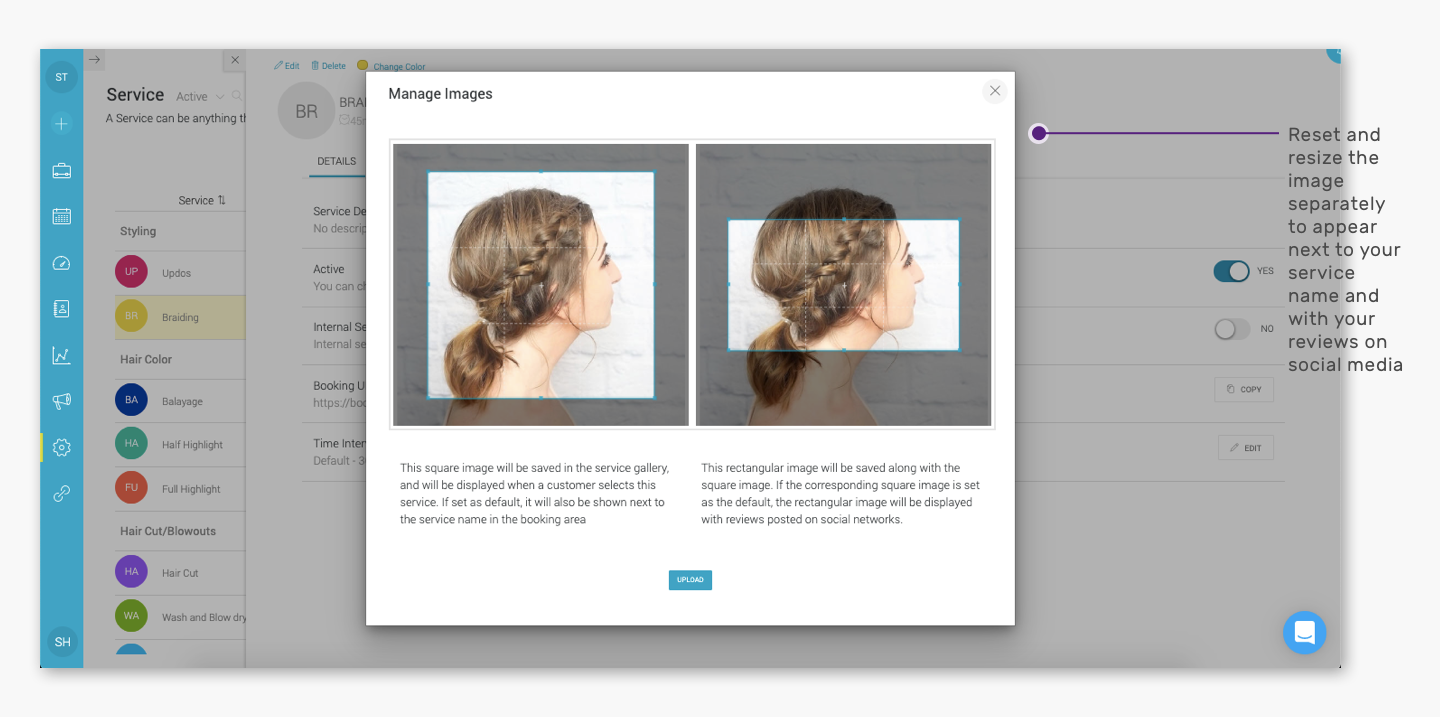
You can format and reset the image separately to appear next to the service name in the client’s booking interface and along with the reviews on social media. You can use your mouse along with the Shift+Control keys on your keyboard to resize and adjust the image.
.
. - Click on ‘Upload’ to add an image for the service.
Note: The size of the image should be less than 2 MB. Supported image formats include jpeg, png and gif