My Space Screen
Once your Appointy account is all set up, the default screen that appears when you log in is the MySpace screen. The MySpace screen is designed in a way that you can view and manage your daily business from this single screen. This makes working with Appointy faster and efficient since you don’t have to switch through tabs repeatedly.
This article gives you a complete overview of the functions that you can perform right from the MySpace screen.
The MySpace single-screen management allows you to:
- View upcoming appointments for the day and total revenue
- Print the day’s schedule with a single click
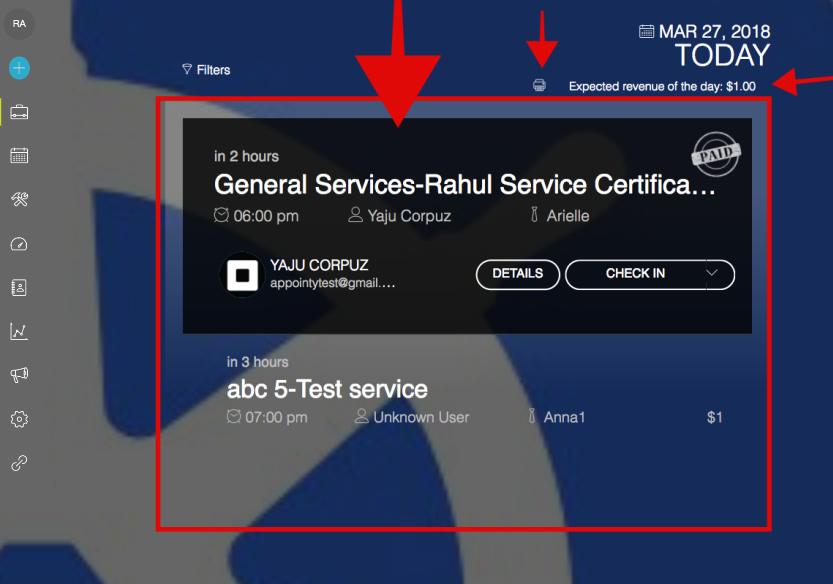
- View schedule for any day by choosing a date from the datepicker with a click. Dates on which one or more appointments are scheduled are marked with a green dot in the calendar.

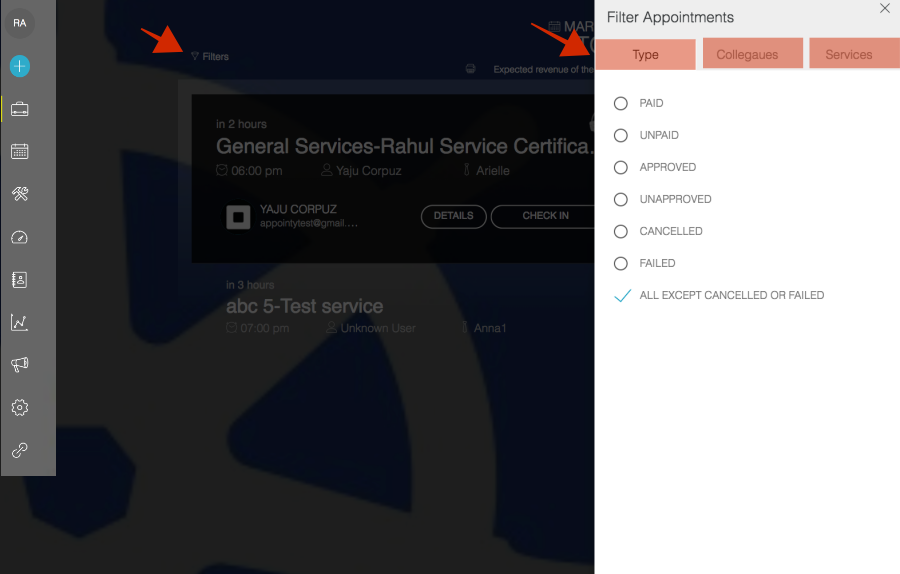
- Filter appointments on the basis of Service, Staff, and Appointment Type.
- View appointment details by clicking on the “Details” button. From there you can also perform the following functions:
1. Email the client
2. Set Status
3. Reschedule appointment
4. Cancel appointment
5. Request a review from your customer
7. Book another appointment for same service and time
8. Add and delete payment for the appointment
9. Add notes to the appointment
10. Edit client details (Mouse over on the client name to edit)
11. Print or Email a receipt
12. Add and Edit payment detail
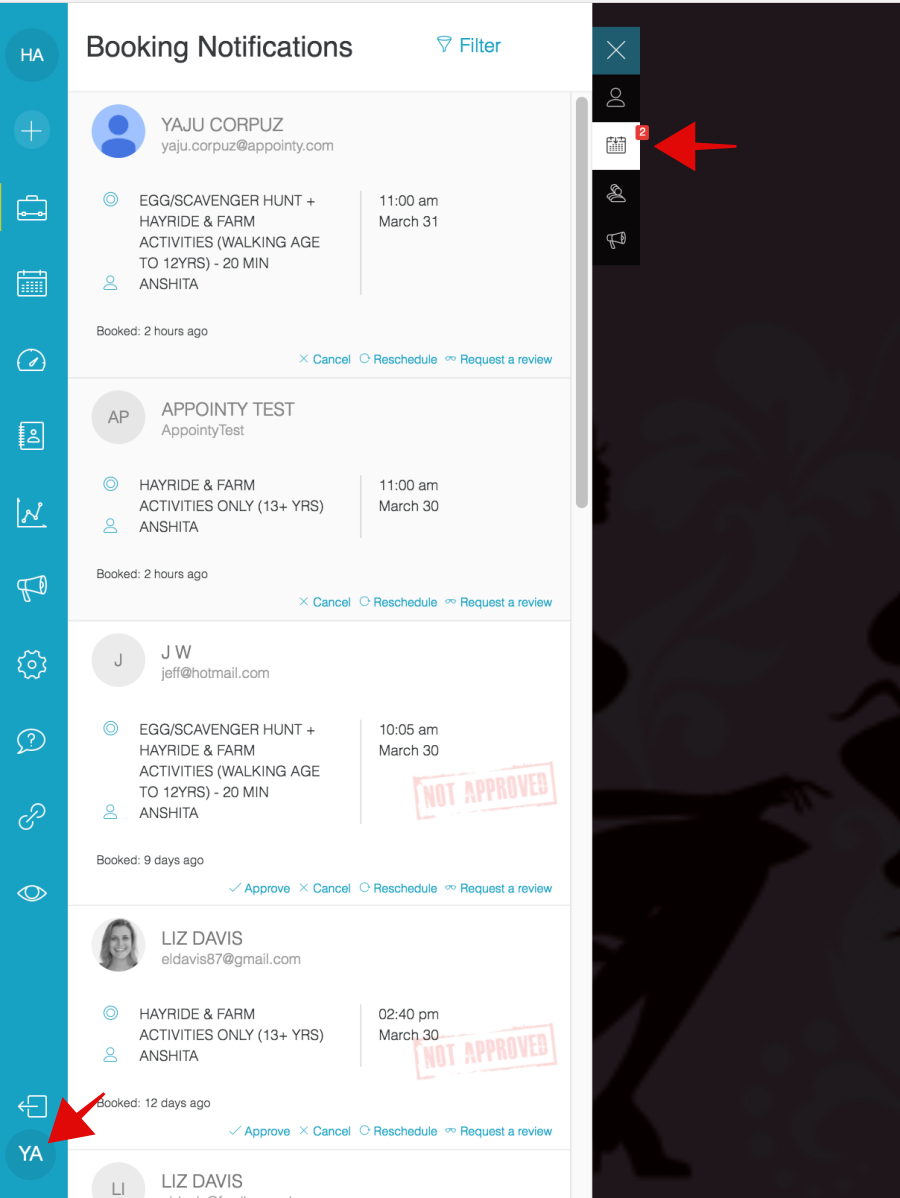
View notifications from the Notification Centre. From here, you can also view:
- List of appointments booked with your business. You can also filter these appointments on the basis of Appointment Type.
- New Registrations
- New reviews
- Connected devices with your Appointy account. You can also revoke access to these devices from here.
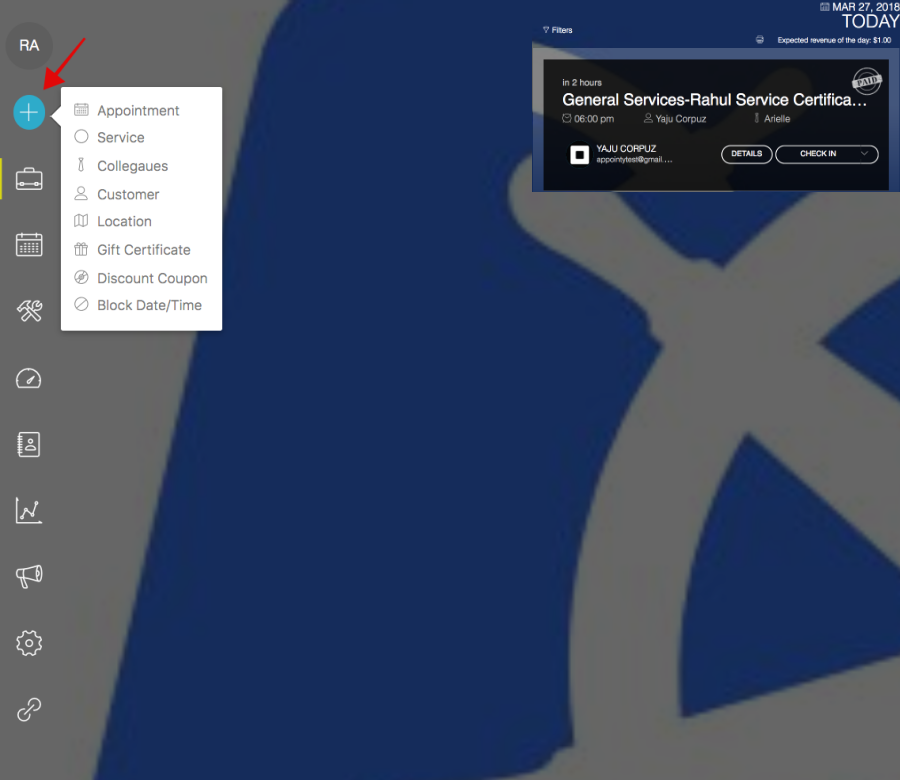
Click on (+) button to perform multiple tasks.
- Book an appointment using the Quick-add button
- Add a new service using the Quick-add button
- Add a new Staff using the Quick-add button
- Add a new location using the Quick-add button
- Create a new Gift Certificate using the Quick-add button
- Add a new customer using the Quick-add button
- Create a new Discount Coupon using the Quick-add button
- Block a date or a time slot on the calendar