Here’s how you can add images to showcase in your client’s booking interface:
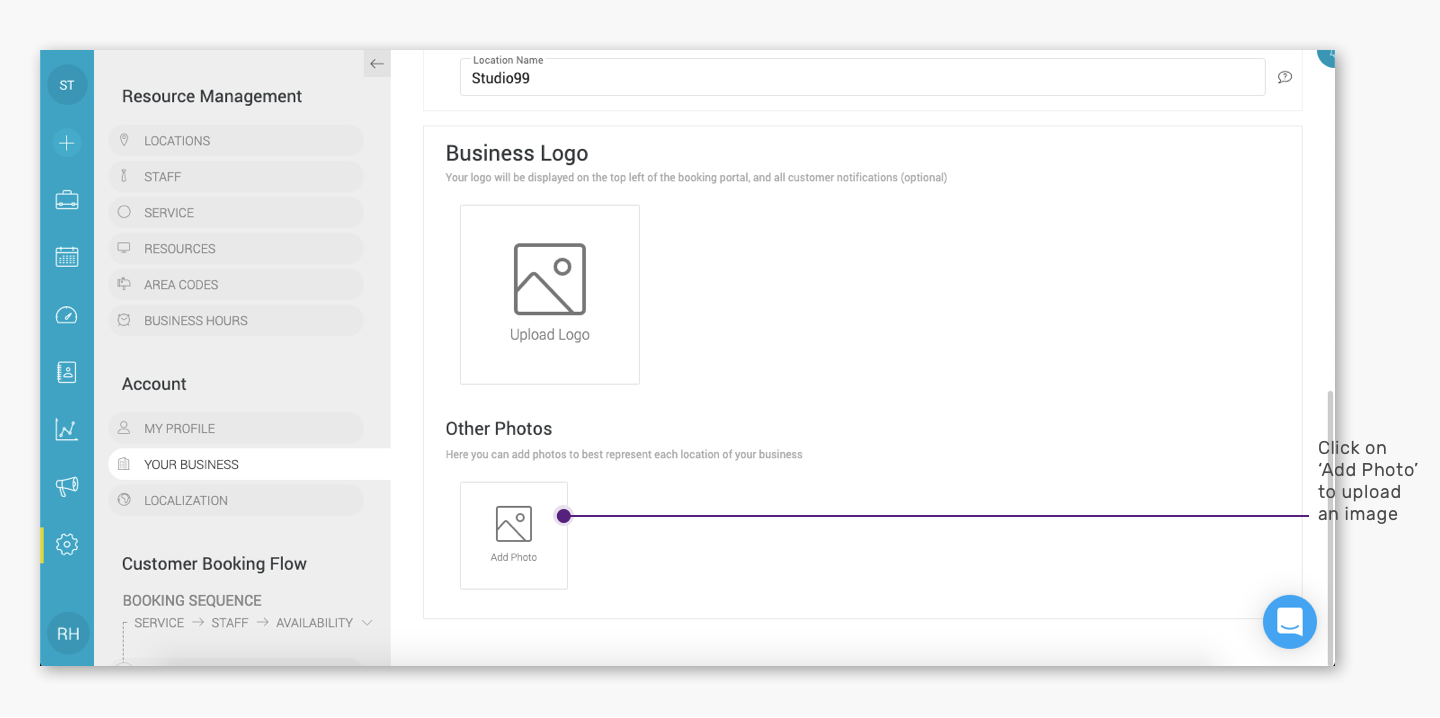
Quick Nav — (Settings → Your Business → Scroll down on the ‘Business Details’ window → Click on the ‘Add Photo’ tab under ‘Other Photos’ → Upload the image from your device (less than 2048 KB) → Click on ‘Upload’)
- Log into your Appointy admin panel.
. - Click on the ‘Settings’ icon in the toolbar appearing on the left.
. - Go to ‘Your Business’ tab under the ‘Account’ section to upload photos.
. - Scroll down on the ‘Business Details’ window and click on ‘Add Photo’ under the ‘Other Photos’ title.
.
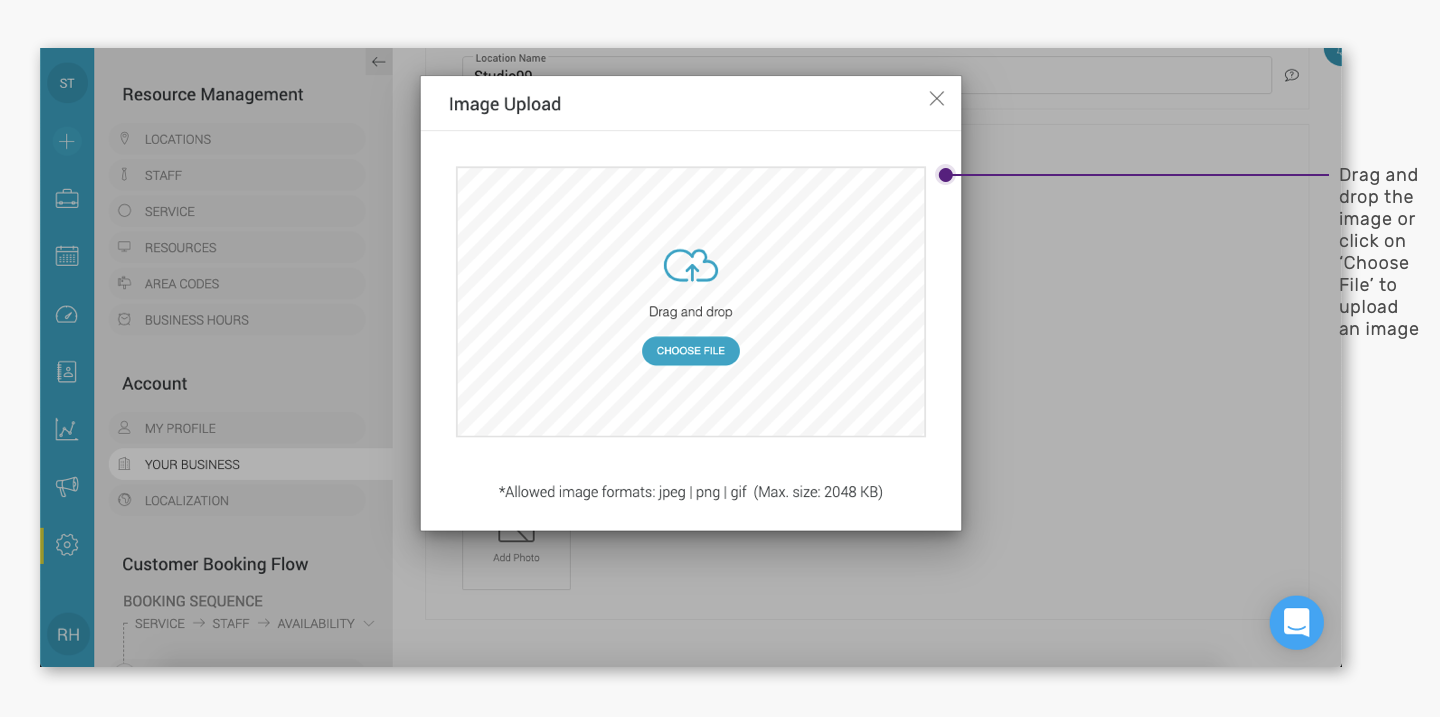
. - Drag and drop the image or click on ‘Choose File’ to upload an image from your device in the ‘Image Upload’ pop-up window.
.
. - You can resize and reset the image with your mouse by using the Shift+Control keys on your keyword and then click on ‘Upload’.
Similarly, you can add more photos that will appear in your client’s booking interface. By default, you will see only 3 photos in your client’s booking interface. Once you click on a photo to enlarge it, other photos that you have uploaded will appear.
Note: The size of the image should be less than 2048 KB. Supported image formats include jpeg, png and gif.