Firstly, you would need to set up a new website property in your Google analytics admin account. While adding the web property, you have to input your Appointy booking URL in the following format:
https://booking.appointy.com/en-US/<APPOINTY-USERNAME>/
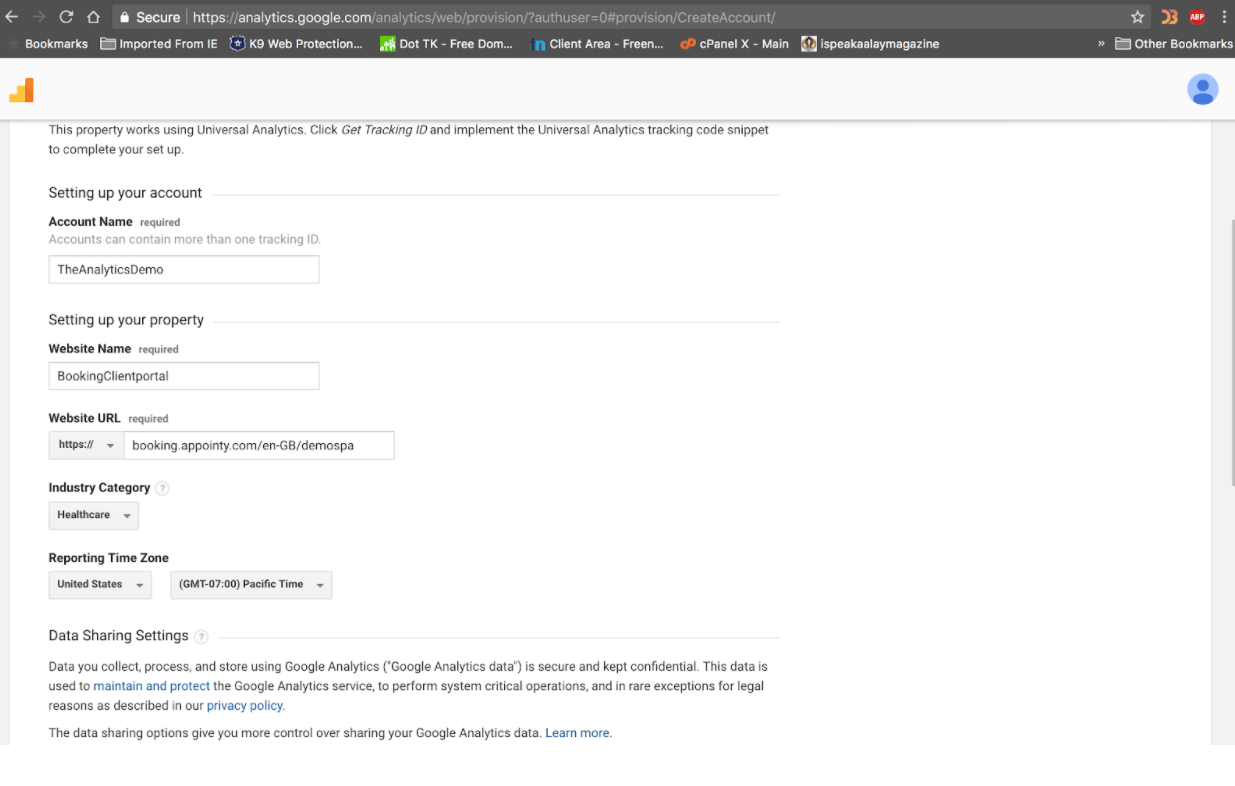
Once you save the web property details, and the Google Analytics tracking ID is generated, you can go ahead and integrate it with your Appointy account.
Step 2:
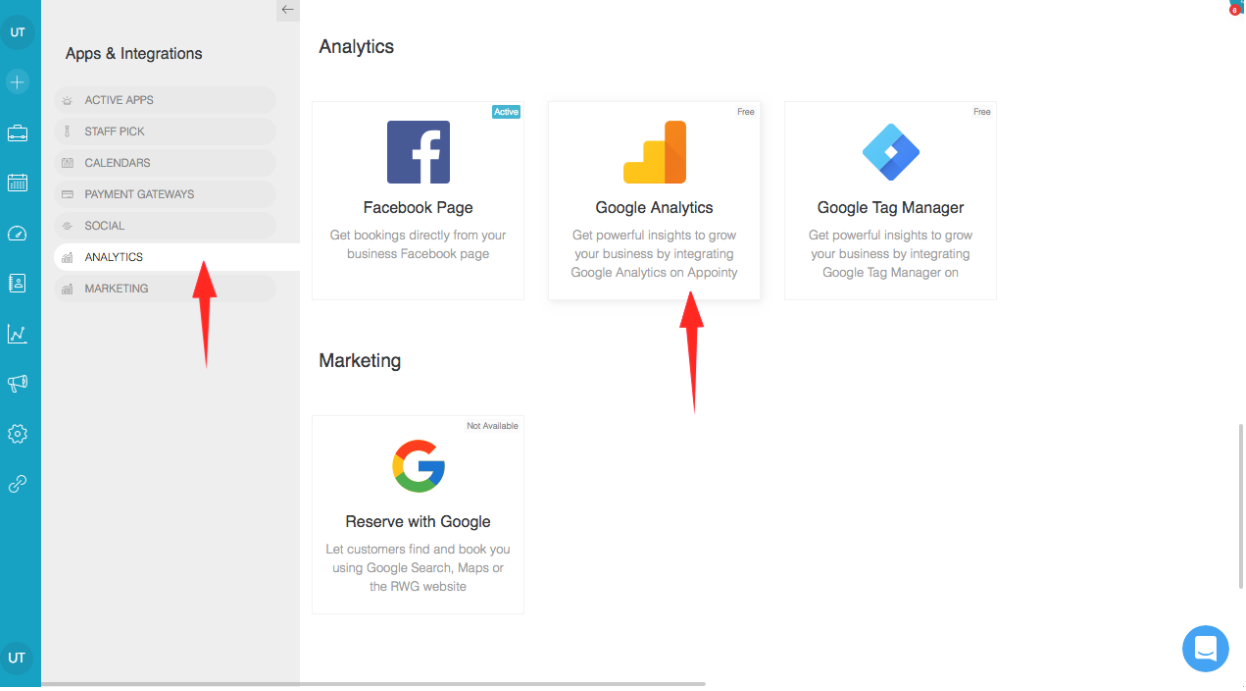
Once logged in into your Appointy admin panel, click on the “Marketplace” icon on the left tab. Then, click on “Analytics” tab on the side menu, to see different types of Analytics integration we offer, and select “Google Analytics”.
Step 3:
Once on the Google Analytics page on the Marketplace, click on “CONNECT”, to authorize Appointy to integrate with your GA account.
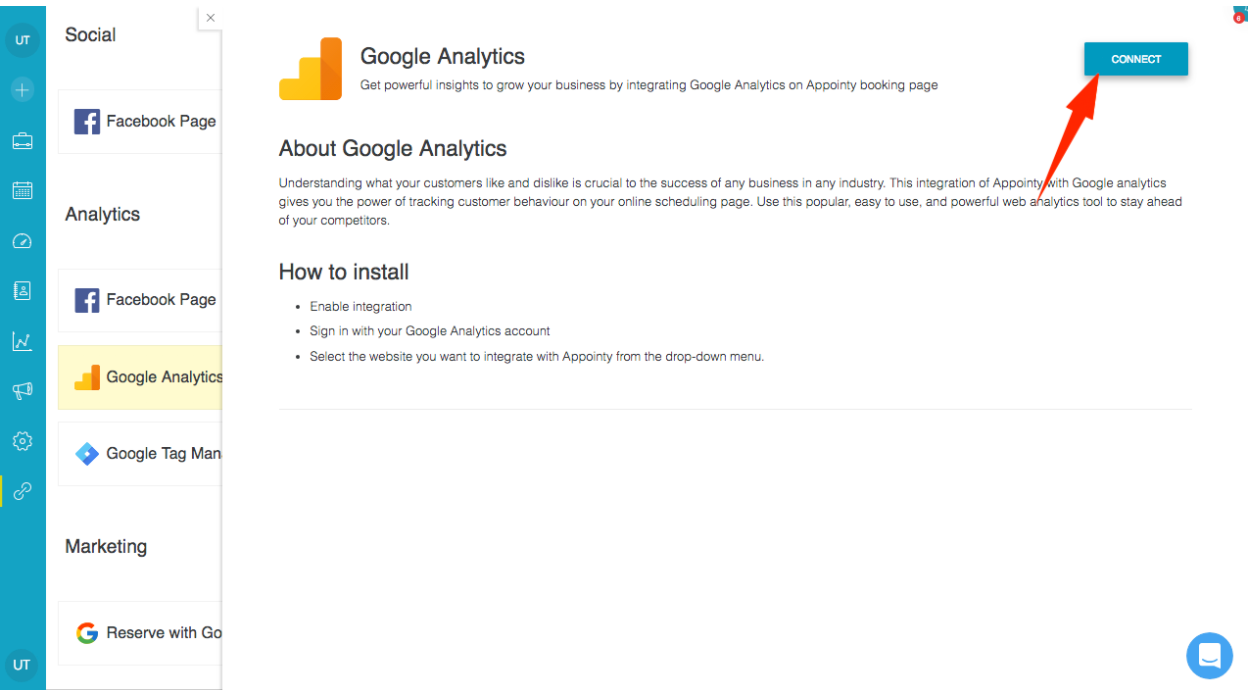
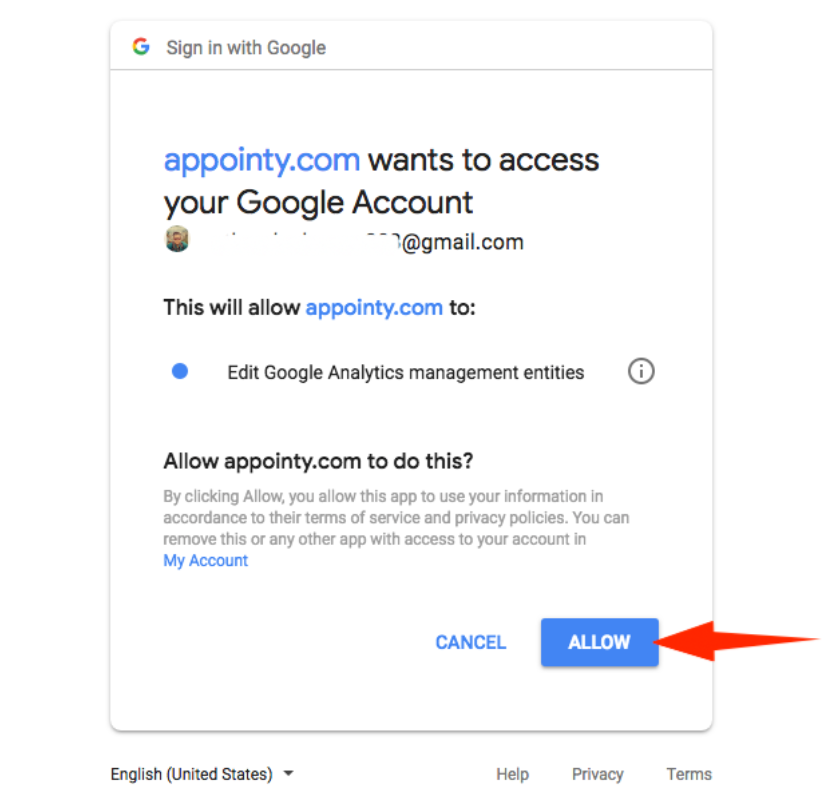
The Google login and authorization window should pop up, asking you to authorize Appointy to access your Google Analytics details. Click on “ALLOW” to complete this process.
When you click on “ALLOW”, Appointy would have successfully integrated with your Google Analytics Account.
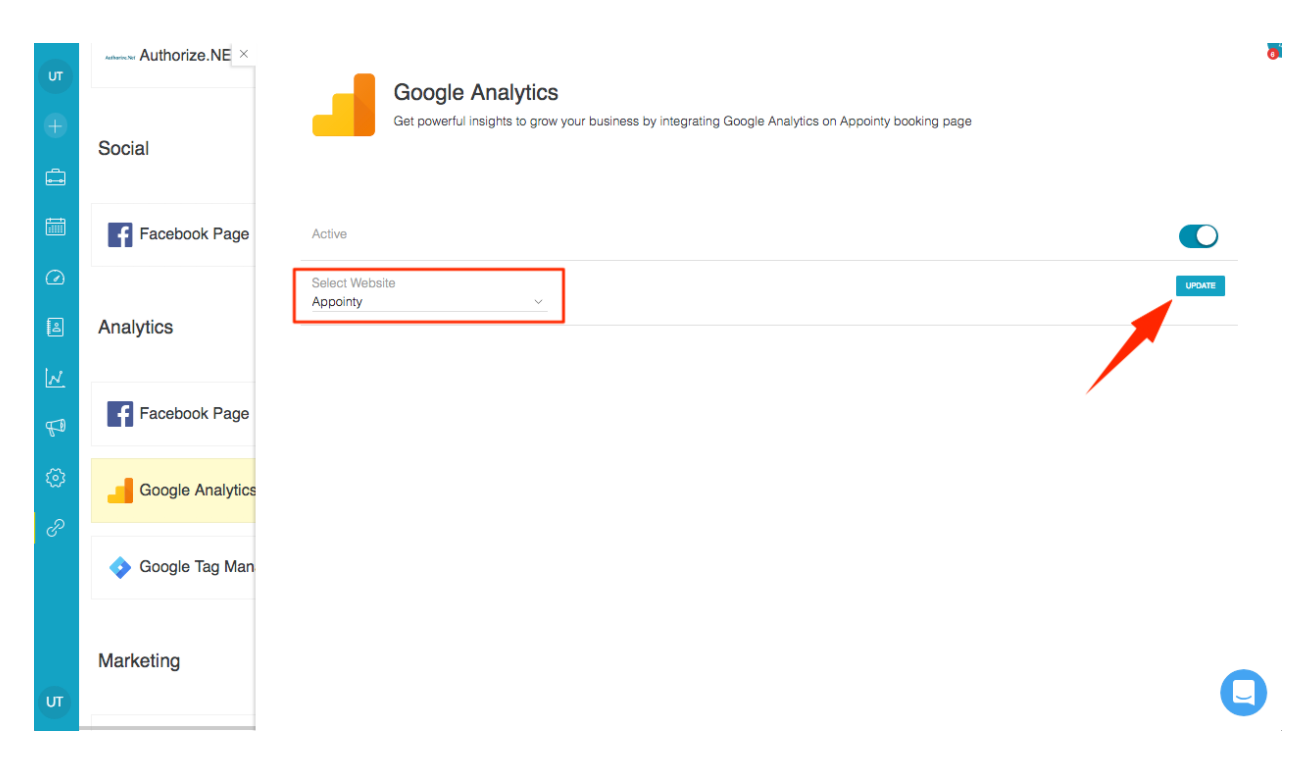
NOTE: If you have multiple web properties added in your account, make sure you have the correct one selected in your Appointy account. You can select and update the website you’d like to integrate with, in Marketplace → “Analytics” tab → Google Analytics.
